Upload a Project
Step-by-step guide to importing projects, quests, and assets into LangQuest from a ZIP and CSV package
Who This Guide Is For
If you've already been working on translation content outside of LangQuest — in spreadsheets, documents, audio folders, or other tools — you can import it into LangQuest rather than re-entering everything by hand.
LangQuest supports three import types through the website dashboard:
- Project upload - Create a new project with quests and assets.
- Quest upload - Add or match quests inside an existing project.
- Asset upload - Add assets to an existing quest.
Step 1: Go to the LangQuest Website and Open the User Area
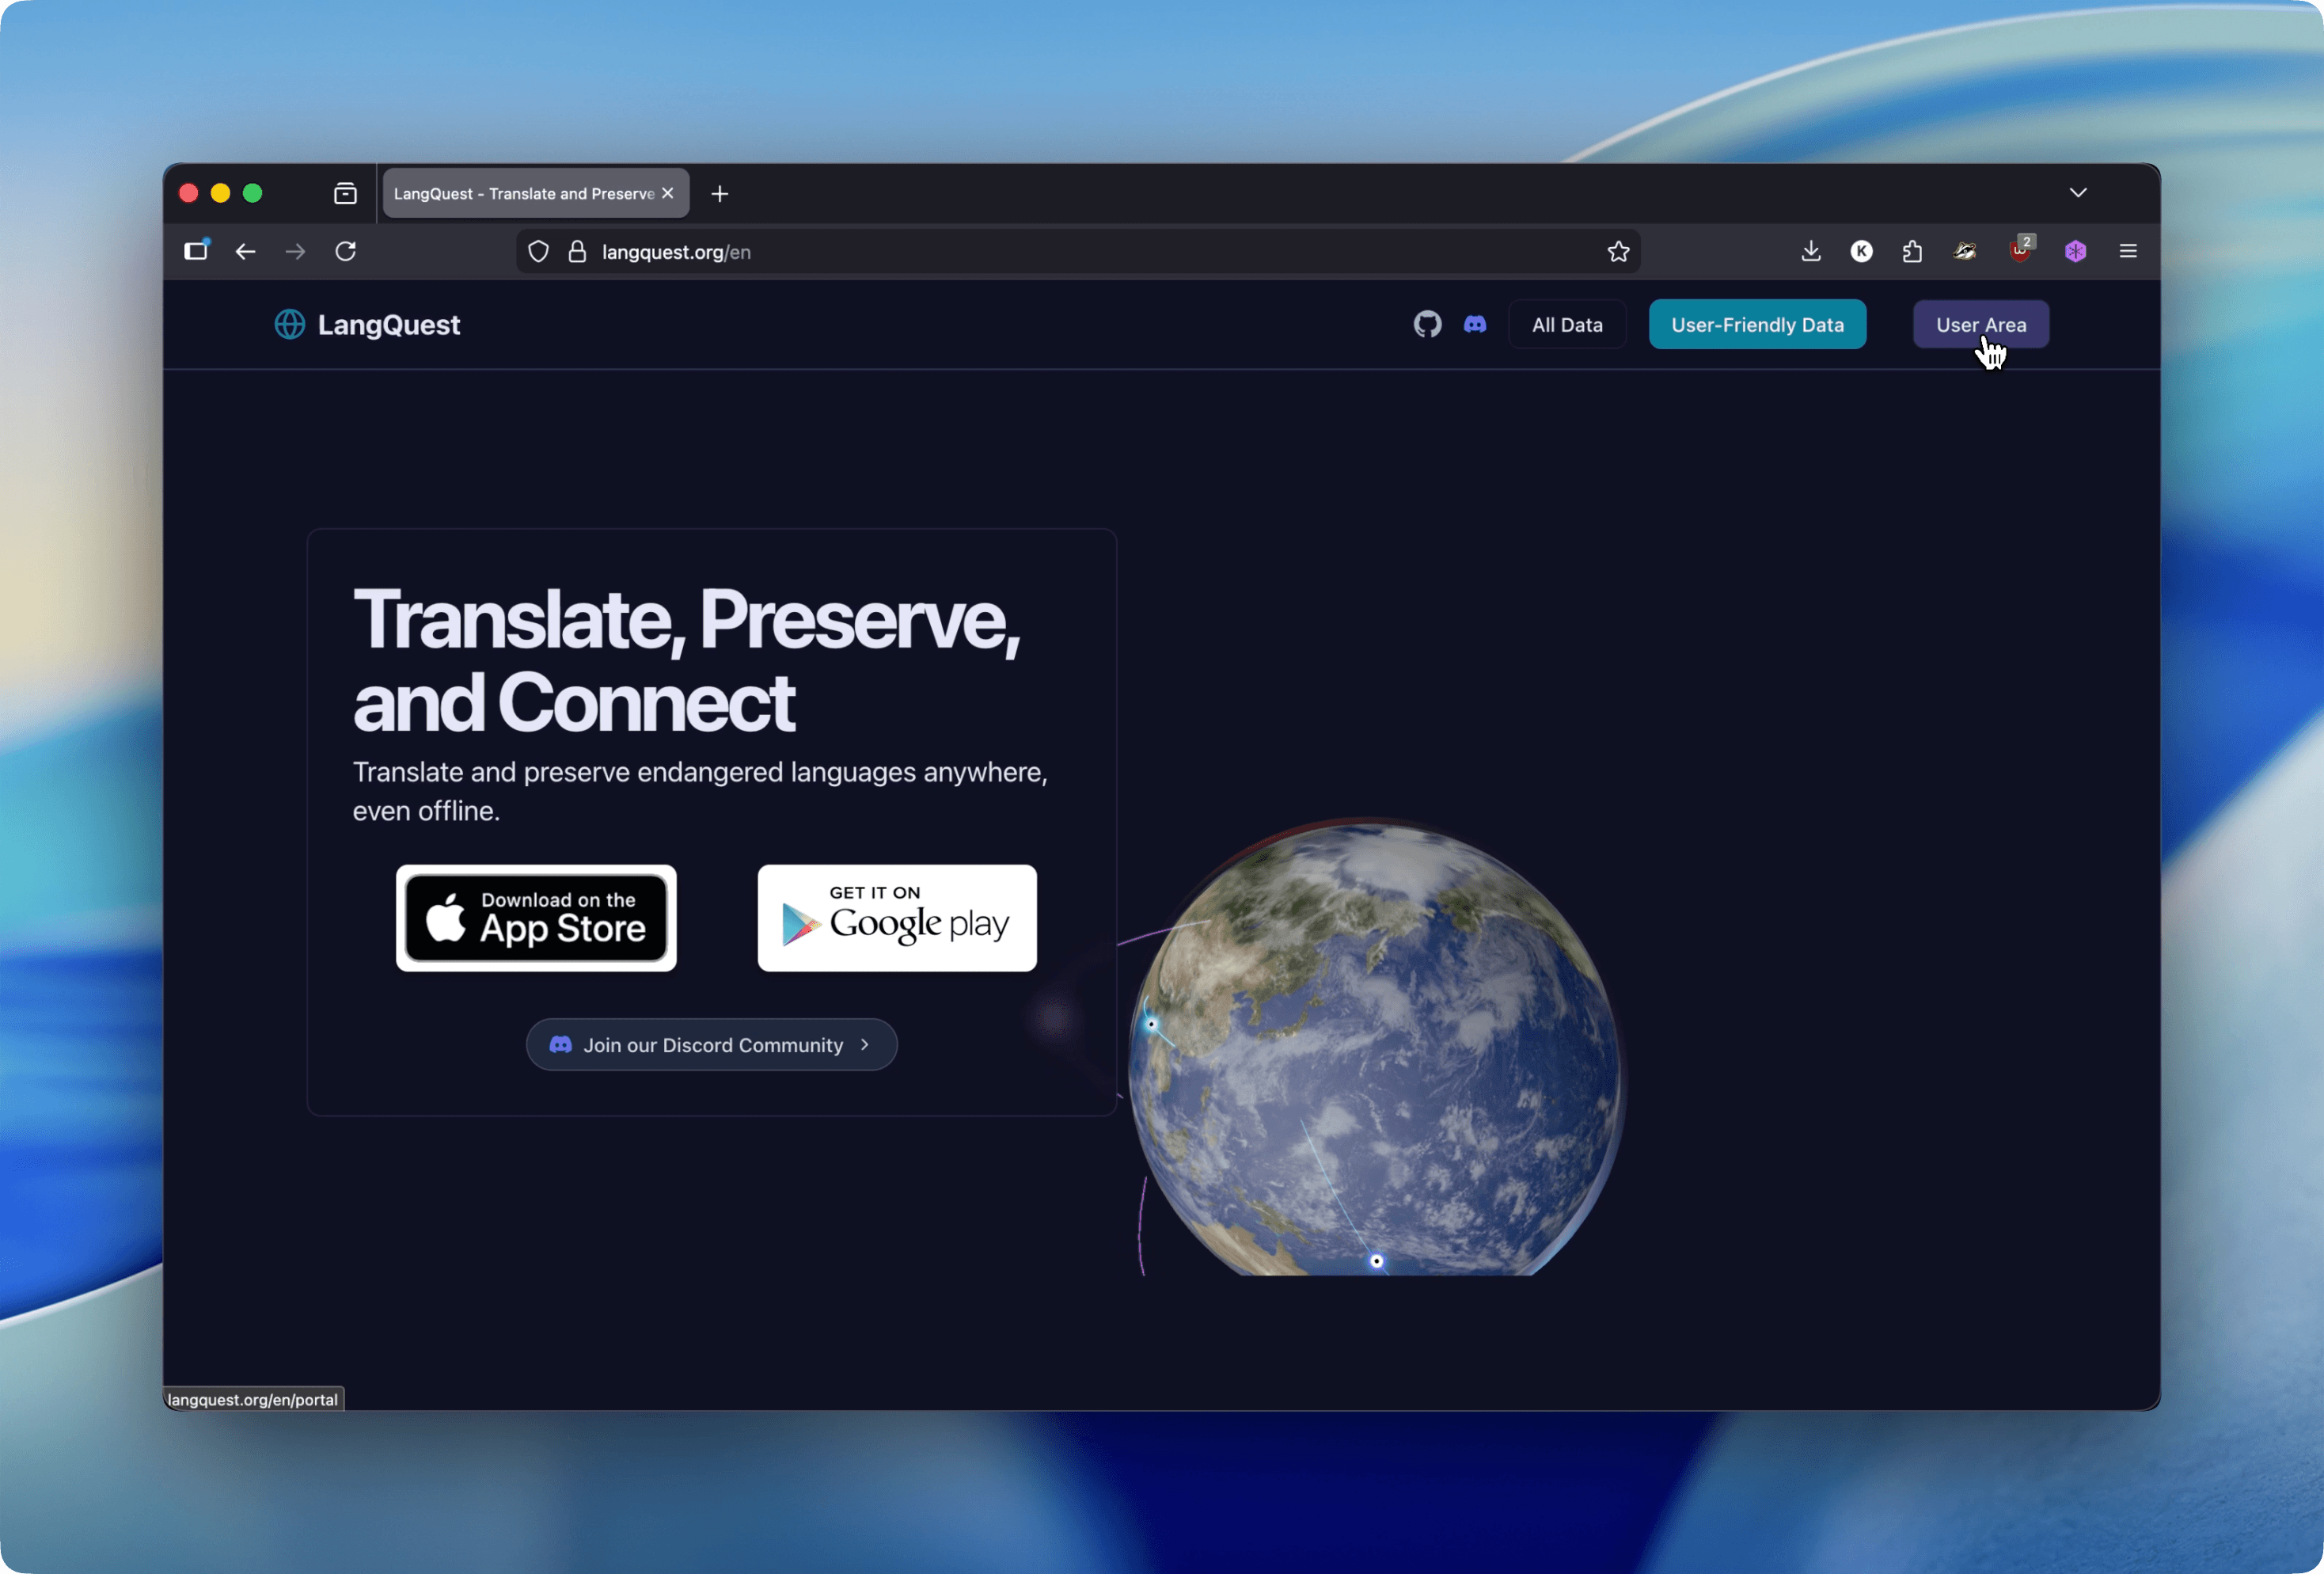
Navigate to langquest.org in your browser. In the top-right corner of the page, click the "User Area" button.
Step 2: Sign In to Your Account
You'll be taken to the Project Management Dashboard login screen. Enter the email address and password you used when you signed up for LangQuest, then click Login.
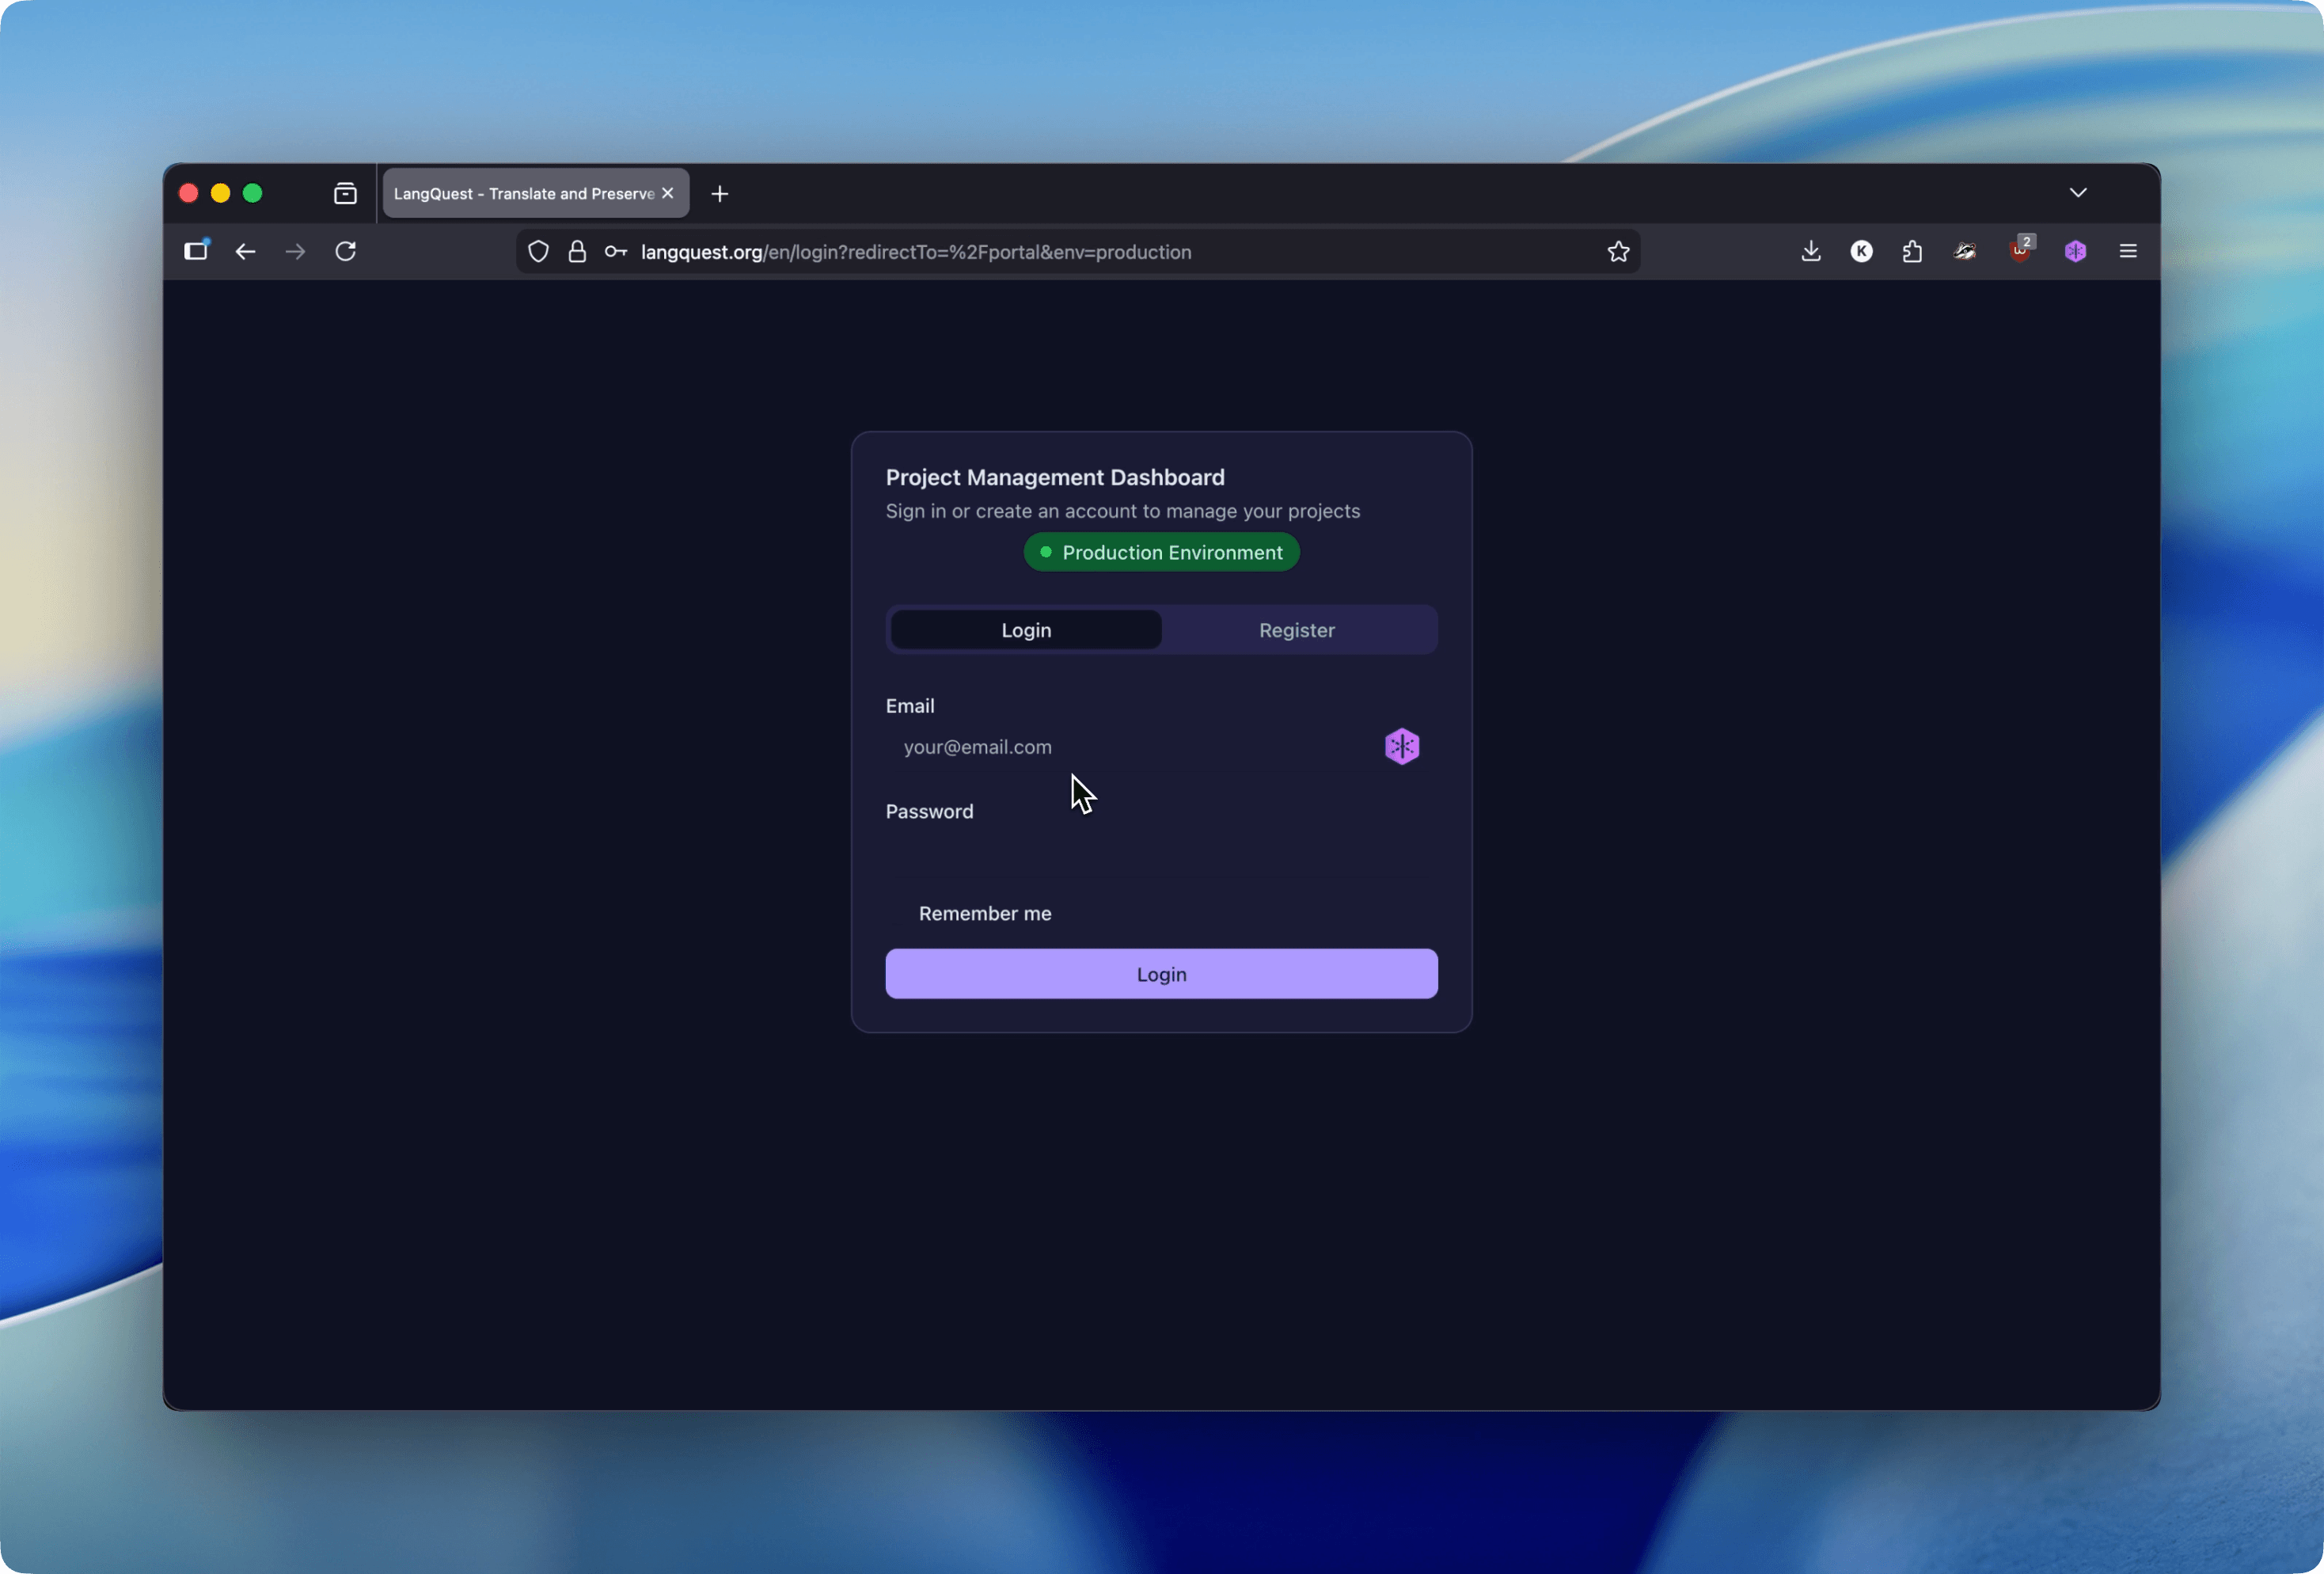
⚠️ Note: You must use the same email you registered with. If you don't have an account yet, click Register to create one first.
Step 3: Click "Upload Project" on Your Dashboard
Once logged in, you'll see your Project Management Dashboard listing all your existing LangQuest projects. In the top-right of the Your Projects section, click the "Upload Project" button.
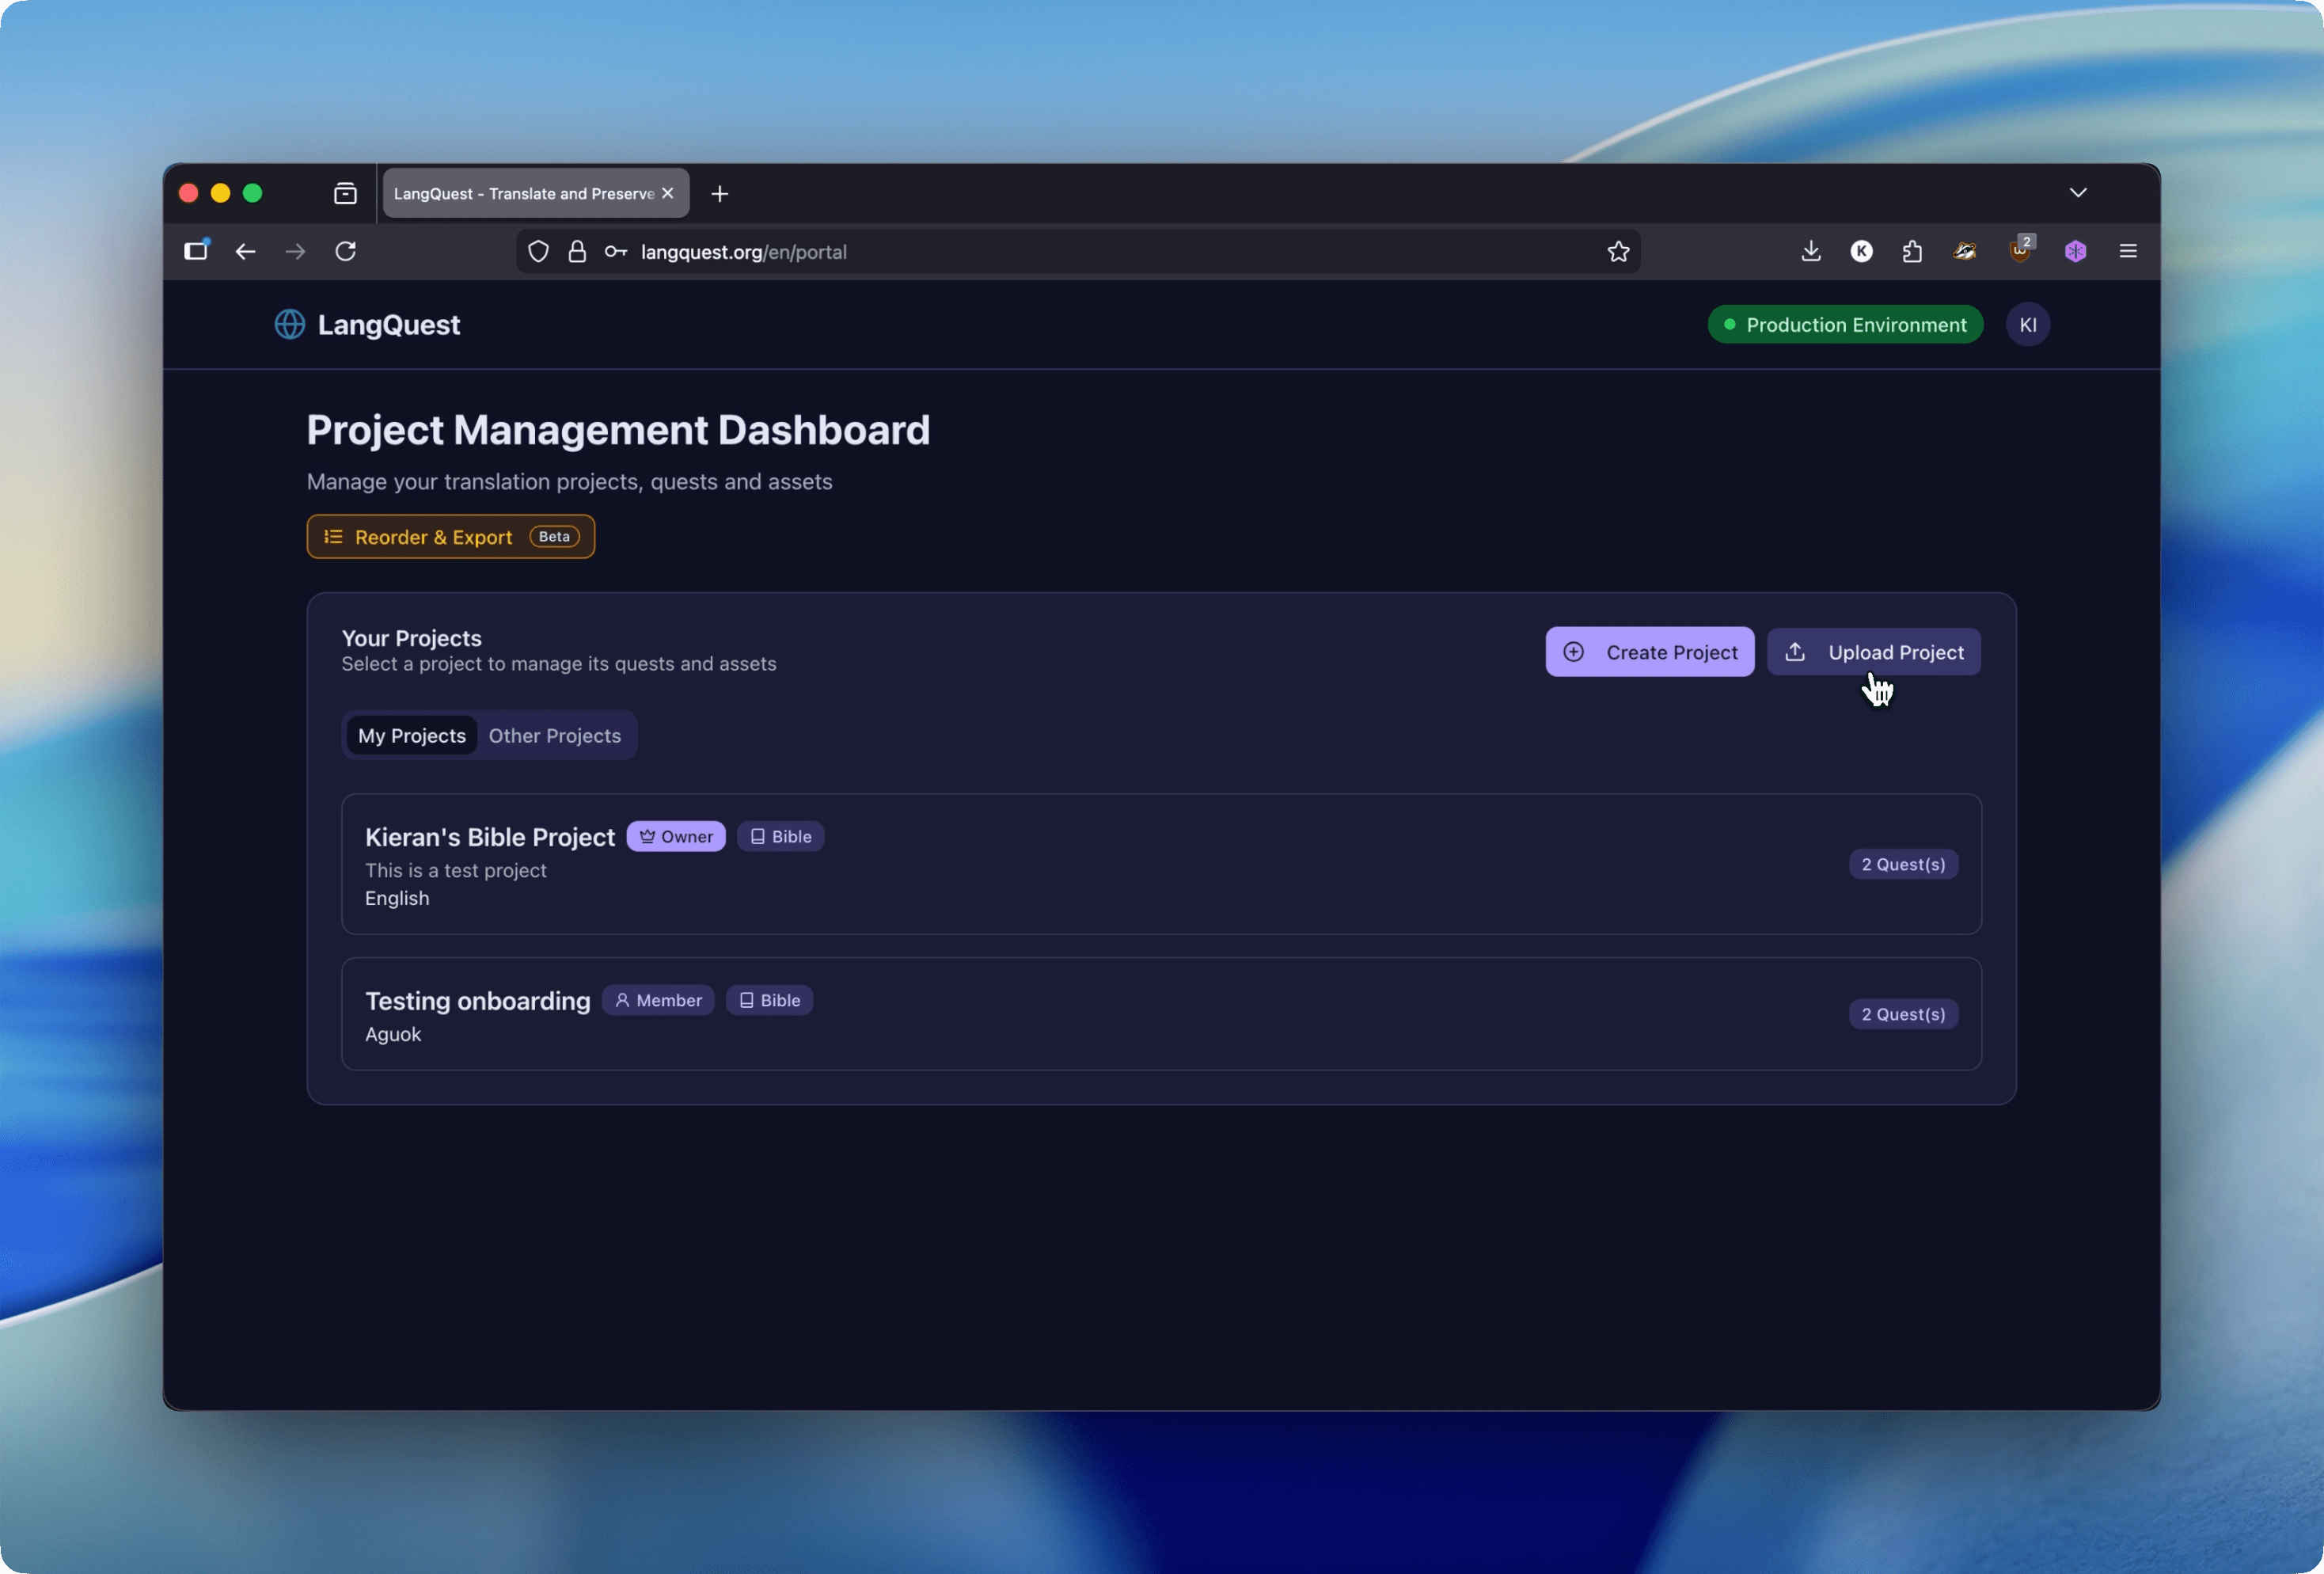
The dashboard may also show project management actions such as creating a project, cloning a project, or opening an existing project to manage its quests and assets.
Step 4: Choose the Right Upload Type
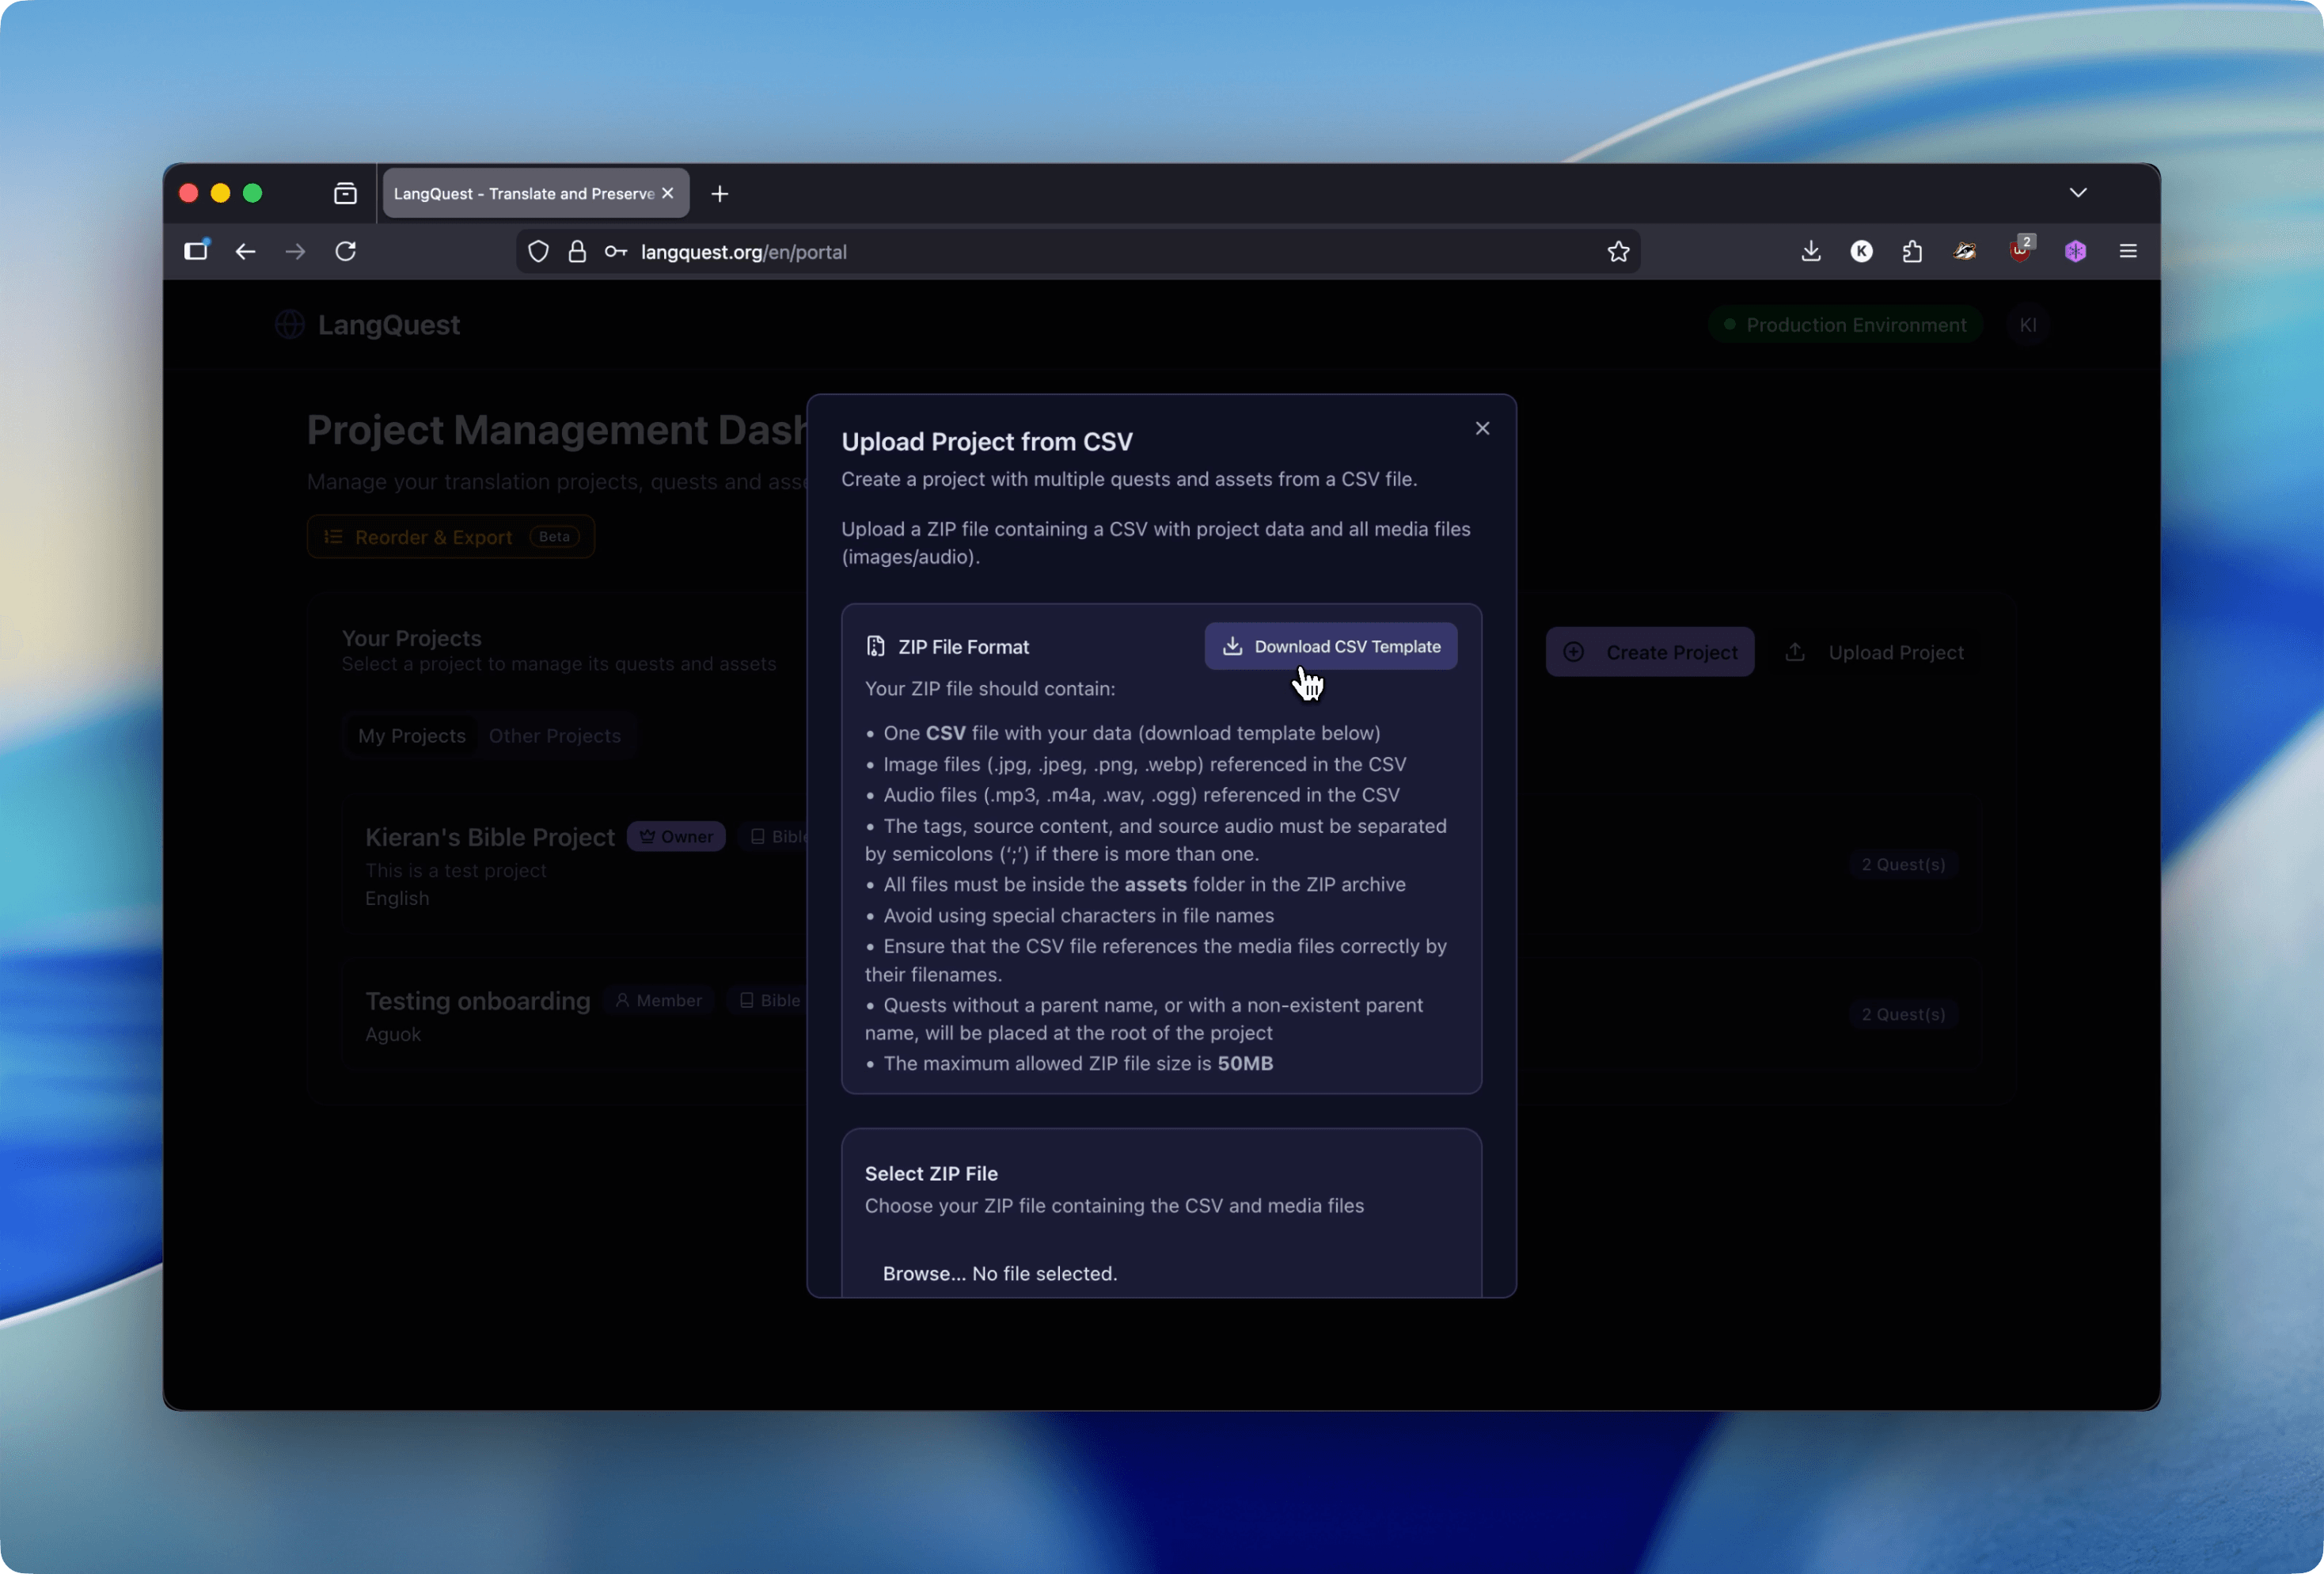
A popup will guide you through the upload process. Start by downloading the CSV template for the upload type you are using.
Use the template from the dashboard rather than creating a CSV from memory. The upload validator expects the columns to match the template names and order.
Project Upload
Use this when you want to create a new project from a prepared file package.
The project template includes columns for:
project_nameproject_descriptionproject_templatetarget_languageparent_quest_namequest_namequest_descriptionquest_tagsasset_nameasset_tagsasset_labelsource_languagesource_imagessource_contentsource_audio
Required fields are project_name, target_language, and quest_name.
Project uploads support one project per file. If you need to create more than one project, prepare one ZIP package per project.
Quest Upload
Use this when the project already exists and you want to add or match quest structure inside it.
The quest template includes:
parent_quest_namequest_namequest_descriptionquest_tagsasset_nameasset_tagsasset_labelsource_languagesource_imagessource_contentsource_audio
Required field: quest_name.
For unstructured projects, quests are matched by Quest Name and Parent Quest Name. For Bible and FIA projects, quests are matched by book/chapter or book/pericope metadata.
Asset Upload
Use this when the quest already exists and you want to add assets to that quest.
The asset template includes:
asset_nameasset_tagsasset_labelsource_languagesource_imagessource_contentsource_audio
Required field: asset_name.
ZIP File Format
Your ZIP file must contain:
- One CSV file in the root of the ZIP file.
- An
assetsfolder in the root of the ZIP file. - Any image or audio files referenced by the CSV inside the
assetsfolder.
Supported media formats:
- Images:
.jpg,.jpeg,.png,.webp - Audio:
.mp3,.m4a,.wav,.ogg
The ZIP file must be 50 MB or smaller.
Formatting Rules
- Keep the CSV in the root directory of the ZIP.
- Put all referenced media files inside the
assetsfolder. - File names in the CSV must exactly match the file names in the ZIP.
- Separate multiple tags, images, or audio files with semicolons (
;). - Avoid special characters in file names.
- At least one asset content field must be present for each asset:
source_content,source_images, orsource_audio. - To create a quest or parent quest without assets, leave asset-related fields empty on that row.
- For project imports, if a quest's parent name cannot be matched, the quest may be created at the root level.
Asset Labels for Bible and FIA
The asset_label field is used to identify verse coverage in Bible and FIA template projects.
- For Bible projects, use a verse number or verse range, such as
1or1-3. - For FIA projects, use a chapter-and-verse reference or range, such as
1:1or1:1-2:3. - Avoid overlapping verse ranges.
This field is optional, but it is important for structured Scripture workflows.
Step 5: Select, Validate, and Review
Scroll down in the popup to the "Select ZIP File" section. Click "Browse..." to open your computer's file picker and choose your prepared ZIP file.
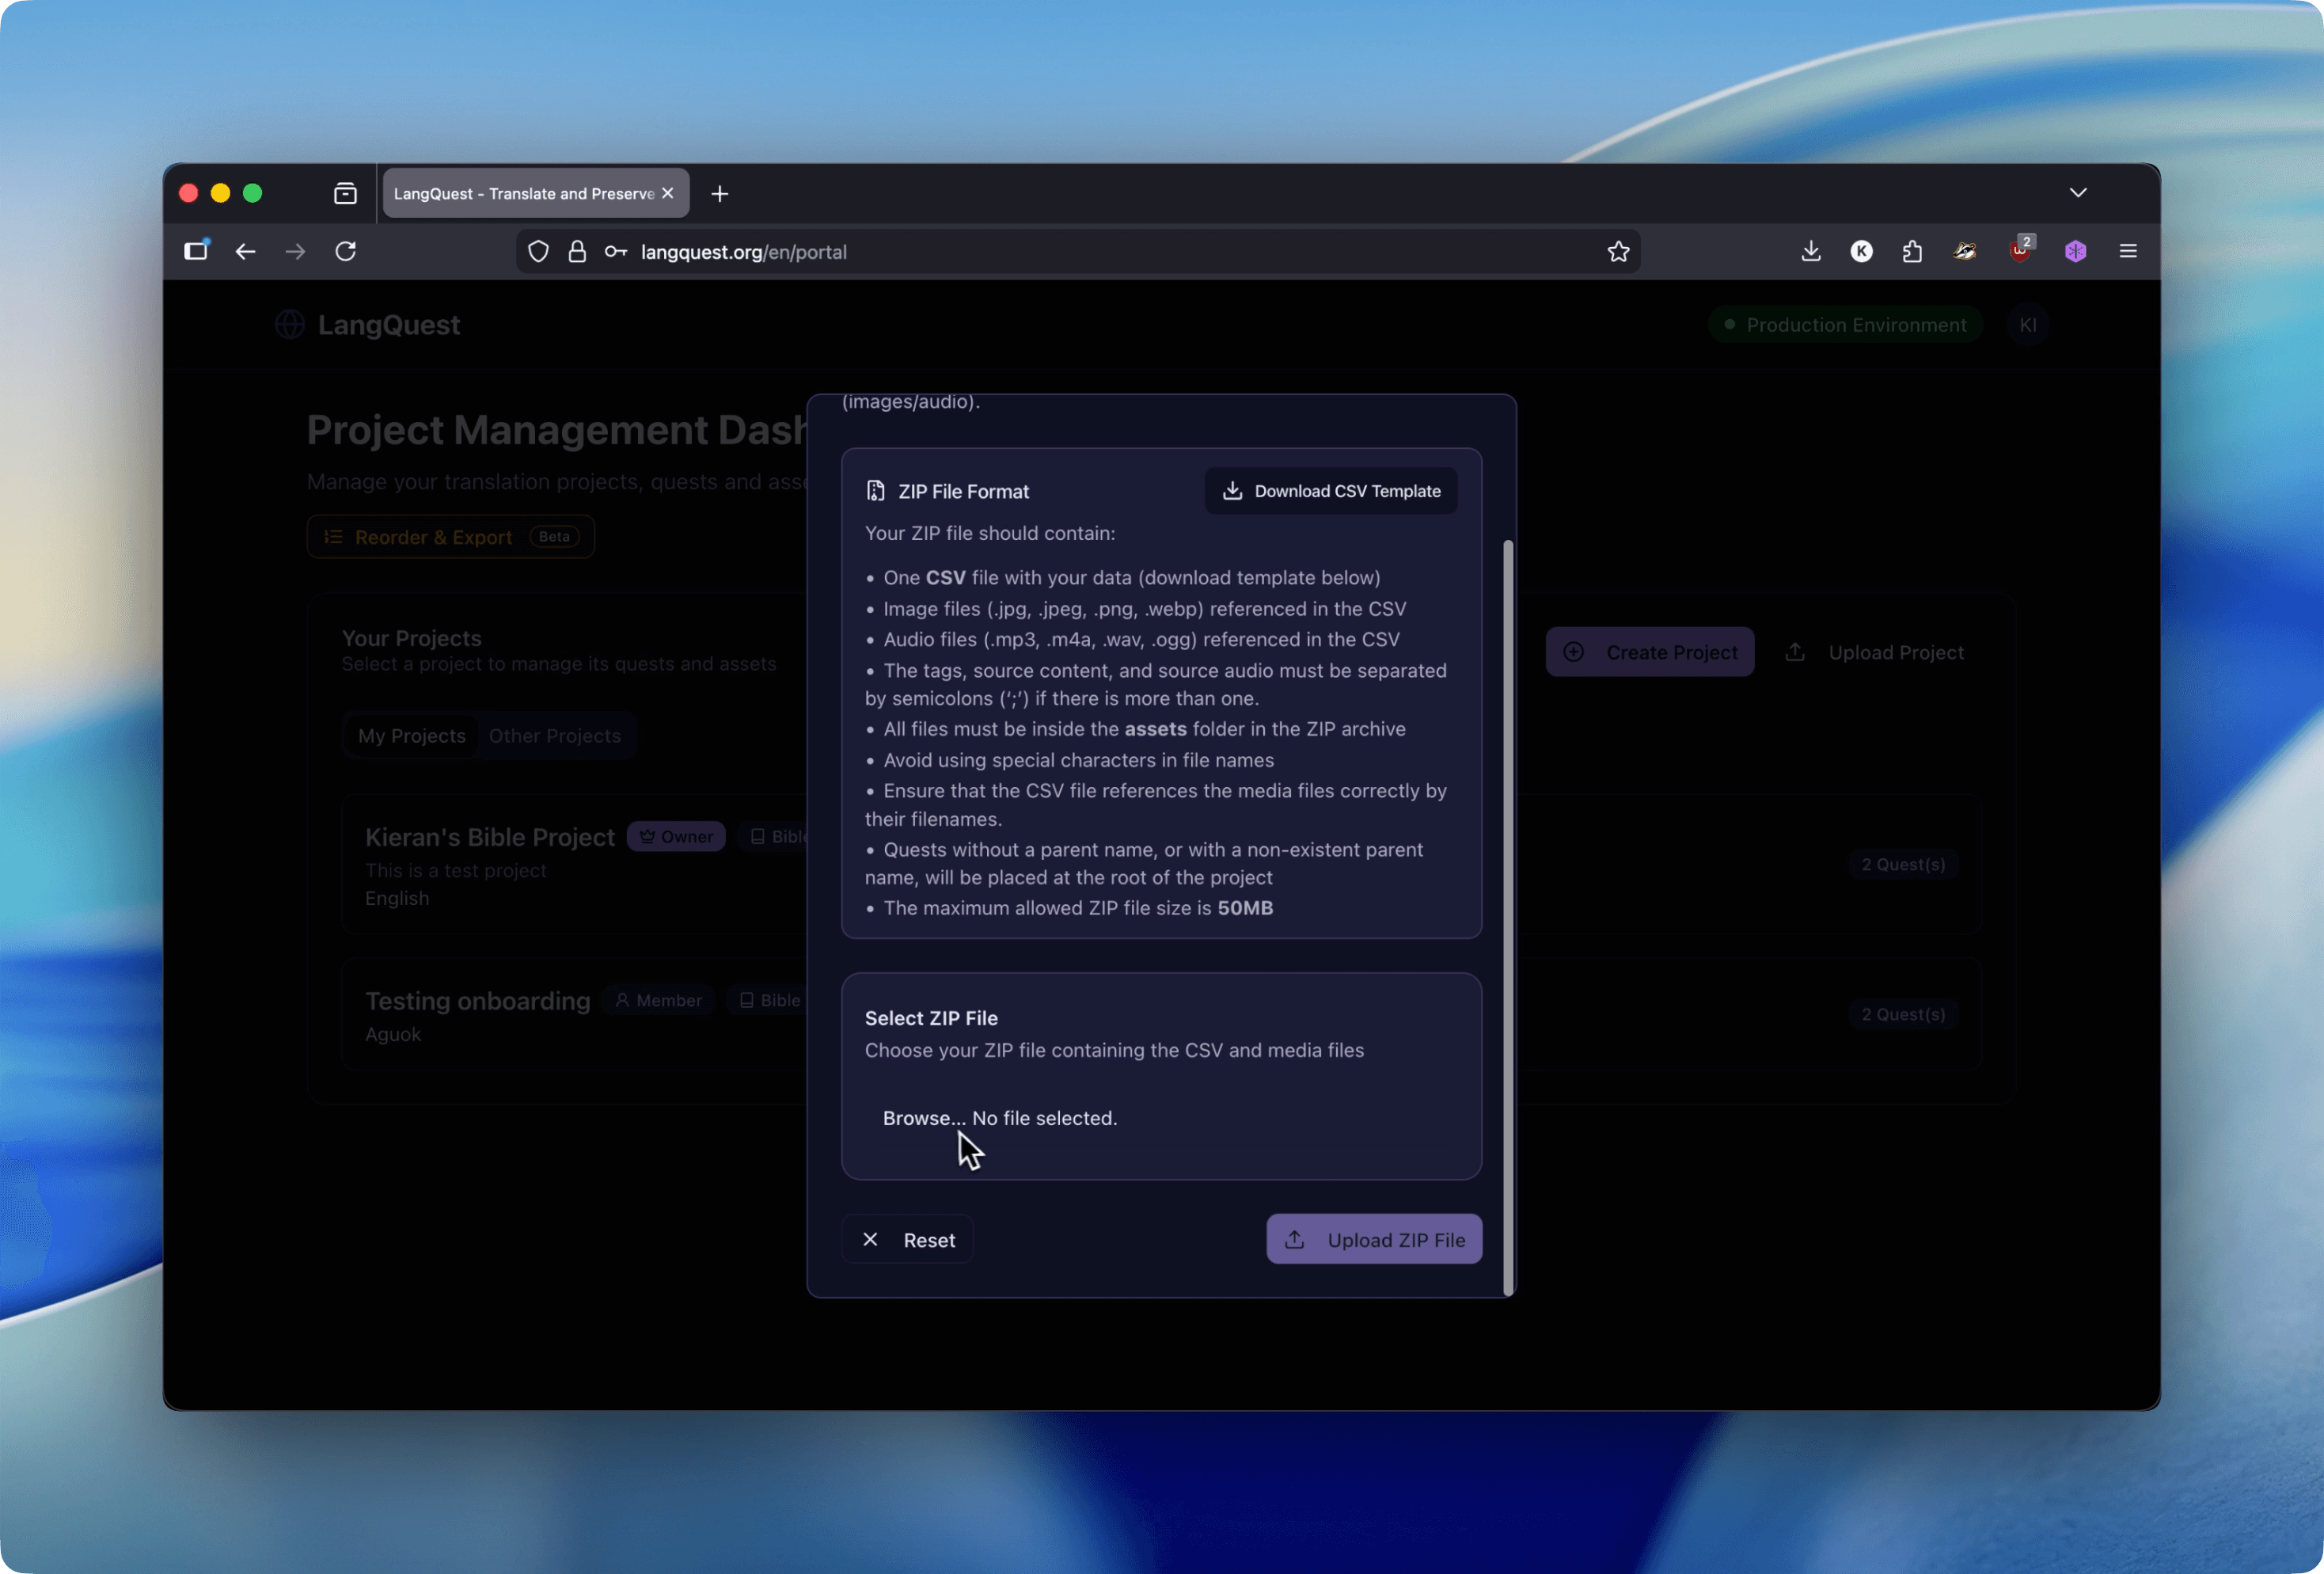
After you select a file, LangQuest validates the package before processing:
- Checks that exactly one CSV exists.
- Checks that the CSV is in the ZIP root.
- Checks that expected columns are present and in the right order.
- Checks required fields.
- Checks that referenced media files exist in the
assetsfolder. - Warns about unused files in the
assetsfolder.
For project imports, you can review project setup fields such as project name, description, template, target language, and FIA content language if needed.
For quest and project imports, LangQuest shows how uploaded content matches the project structure. Items that cannot be matched may appear as Undefined Items so you can move them into the correct location, edit labels, or discard them before continuing.
Step 6: Process the Import
When validation passes and the content structure looks correct, continue to the processing step.
LangQuest will create or update the appropriate project, quest, and asset records. Keep the page open until processing finishes.
If processing fails, review the error messages and fix the CSV or ZIP package before trying again.
Common Upload Problems
"No CSV file was found"
Make sure the ZIP contains one .csv file.
"Only one CSV file is allowed"
Remove extra CSV files from the ZIP.
"CSV file must be placed in the root"
Move the CSV to the top level of the ZIP, not inside the assets folder.
"Missing required columns" or "Invalid header order"
Download a fresh template and copy your data into it without renaming or reordering columns.
"File is referenced but was not found"
Check spelling, capitalization, and file extensions. The value in source_images or source_audio must match the file name in the assets folder.
Upload is slow or fails
Try a smaller package, check your connection, and keep the browser tab open while the import runs.
Summary
- Go to langquest.org and click User Area
- Log in with your LangQuest email and password
- Click "Upload Project" or open the project/quest where you want to import content
- Download the correct CSV template
- Prepare one ZIP with the CSV at the root and media files in
assets - Validate and review the upload package
- Process the import
Your project will appear in your dashboard once the upload is complete, ready to work on in the LangQuest app.
Next Steps
- LangQuest Basics - Learn how to record and work with content inside the app
- Project Membership - Invite team members to collaborate on your newly uploaded project
- Data Management - Understand dashboard project, data, and privacy behavior